Pose Breakdown: Flying Pigeon
Learn how to do Flying Pigeon Pose (Eka Pada Galavasana). This free beginner video tutorial will teach you the proper alignment and technique to help you safely move into Flying Pigeon.
Flying Pigeon is a challenging arm balance that requires a great deal of strength and openness. However, once you master this pose, you will truly soar!
HERE ARE SOME HEALTH BENEFITS OF FLYING PIGEON
Opens your hips
Strengthens upper body and core muscles
Improves your balance and stability
How to do Flying Pigeon
1.
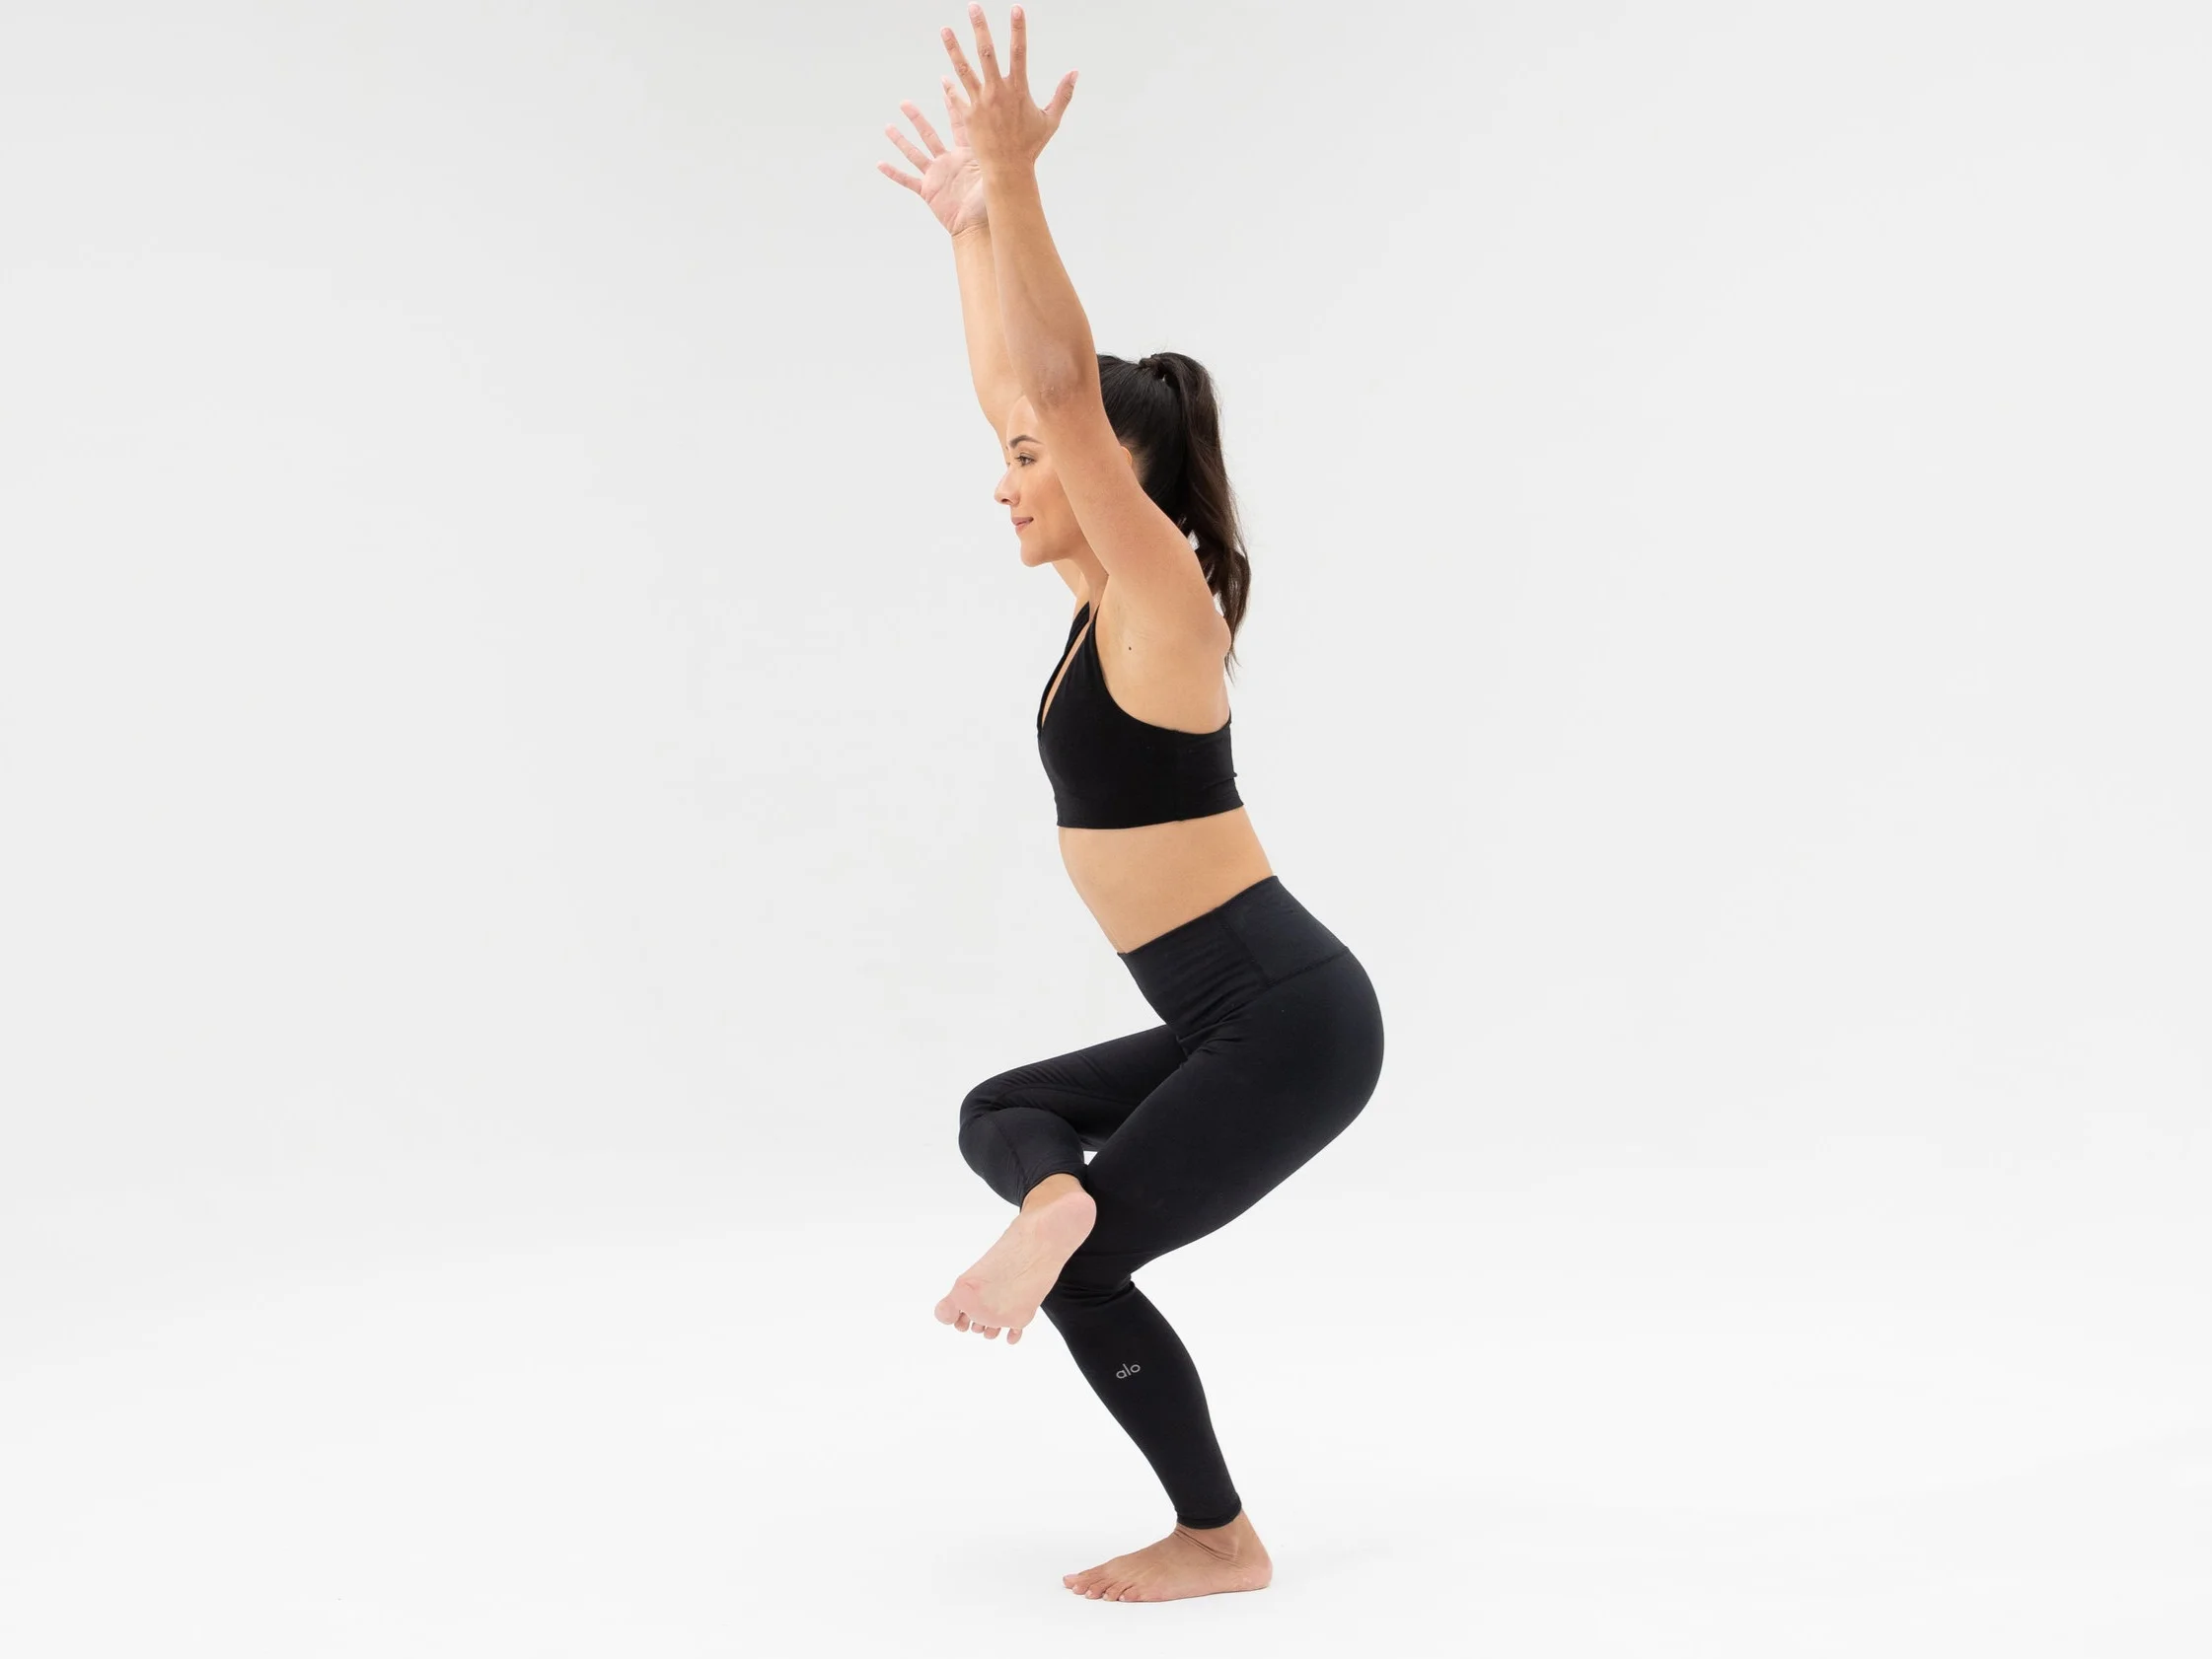
Come into a standing position. Bring one ankle over the opposite leg’s knee, and bend your knee into a figure four position, reaching your arms up.
2.
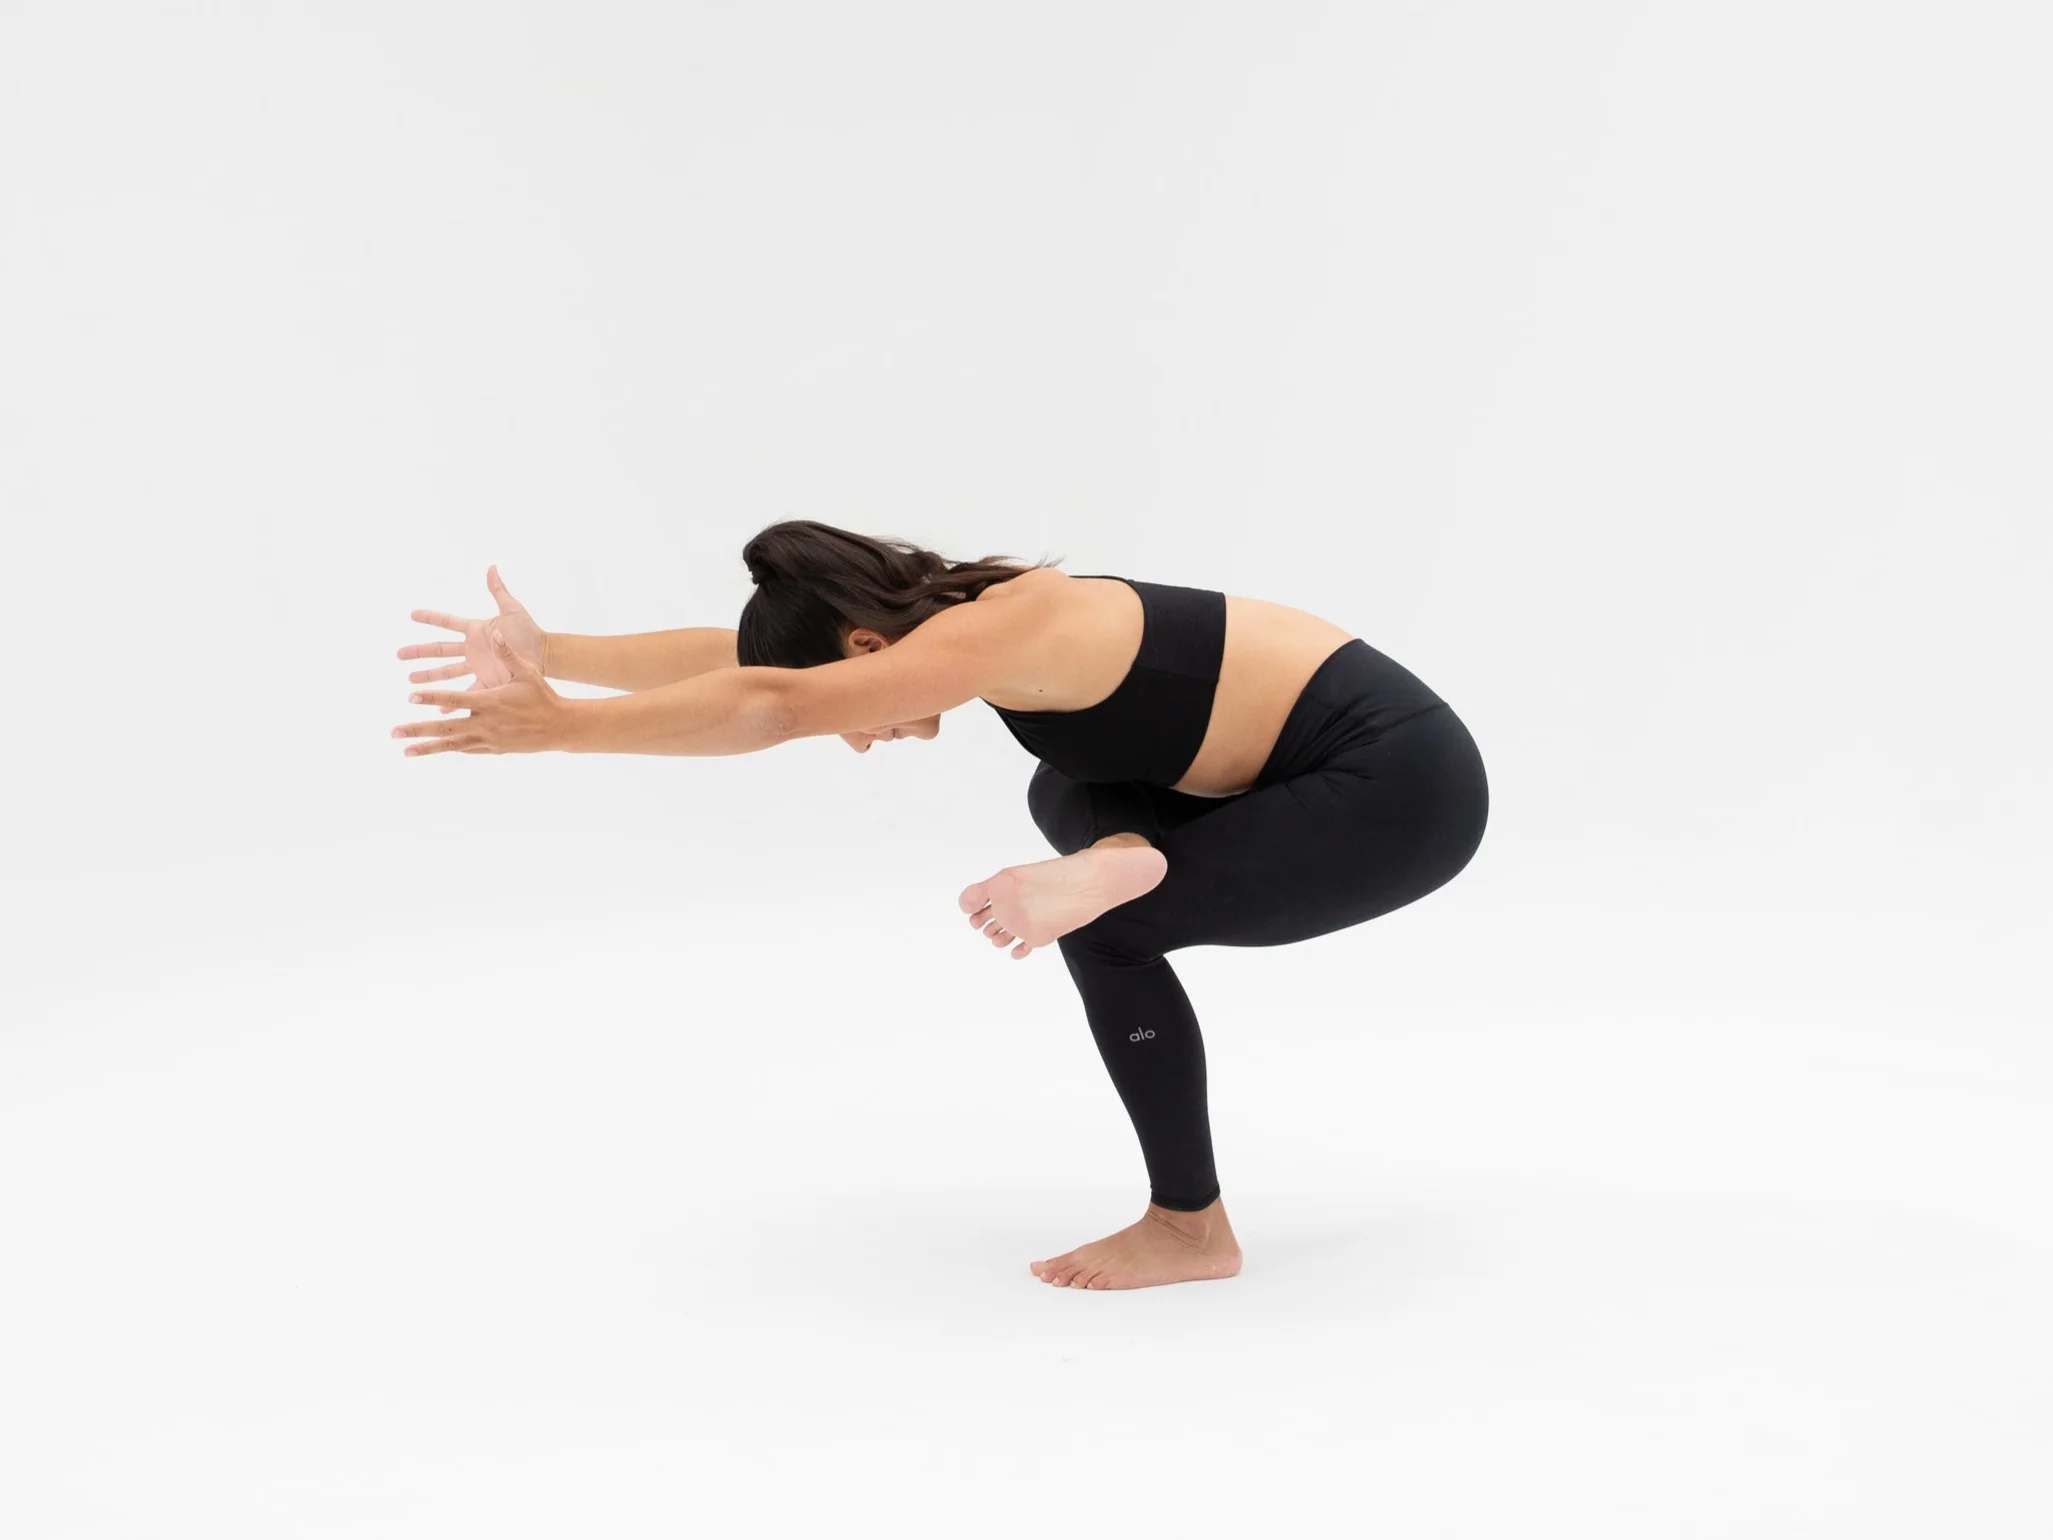
Inhale, and as you exhale, fold over your bent leg’s calf.
3.
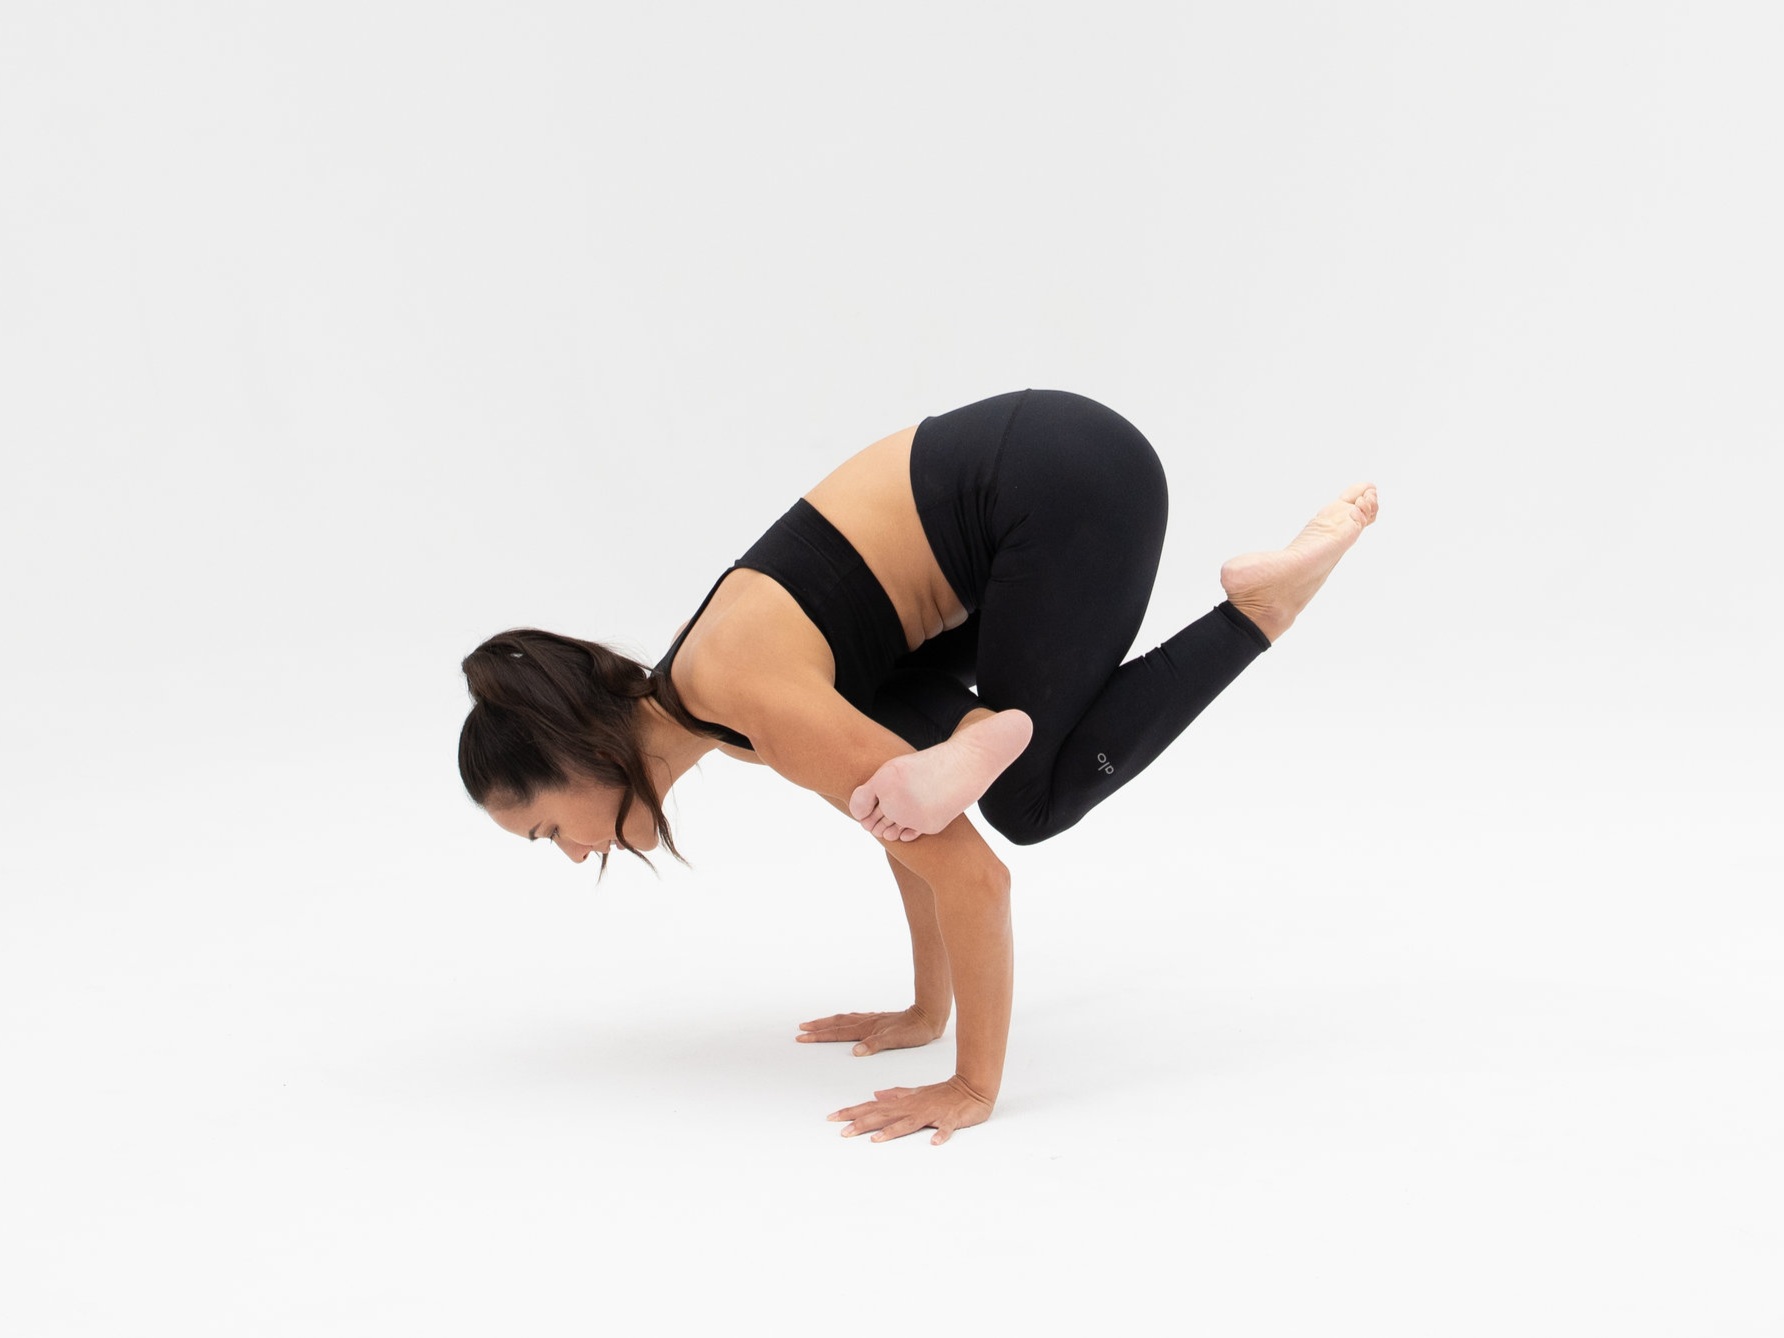
Hook the bent leg foot around the top of the opposite arm tricep. Plant your palms flat down and bring your bent leg shin as high as you can on your triceps.
4.
Lean forward, squeeze your elbows in, and begin to bend your elbows, pulling your standing leg heel towards up your glute and pointing your toes.
5.
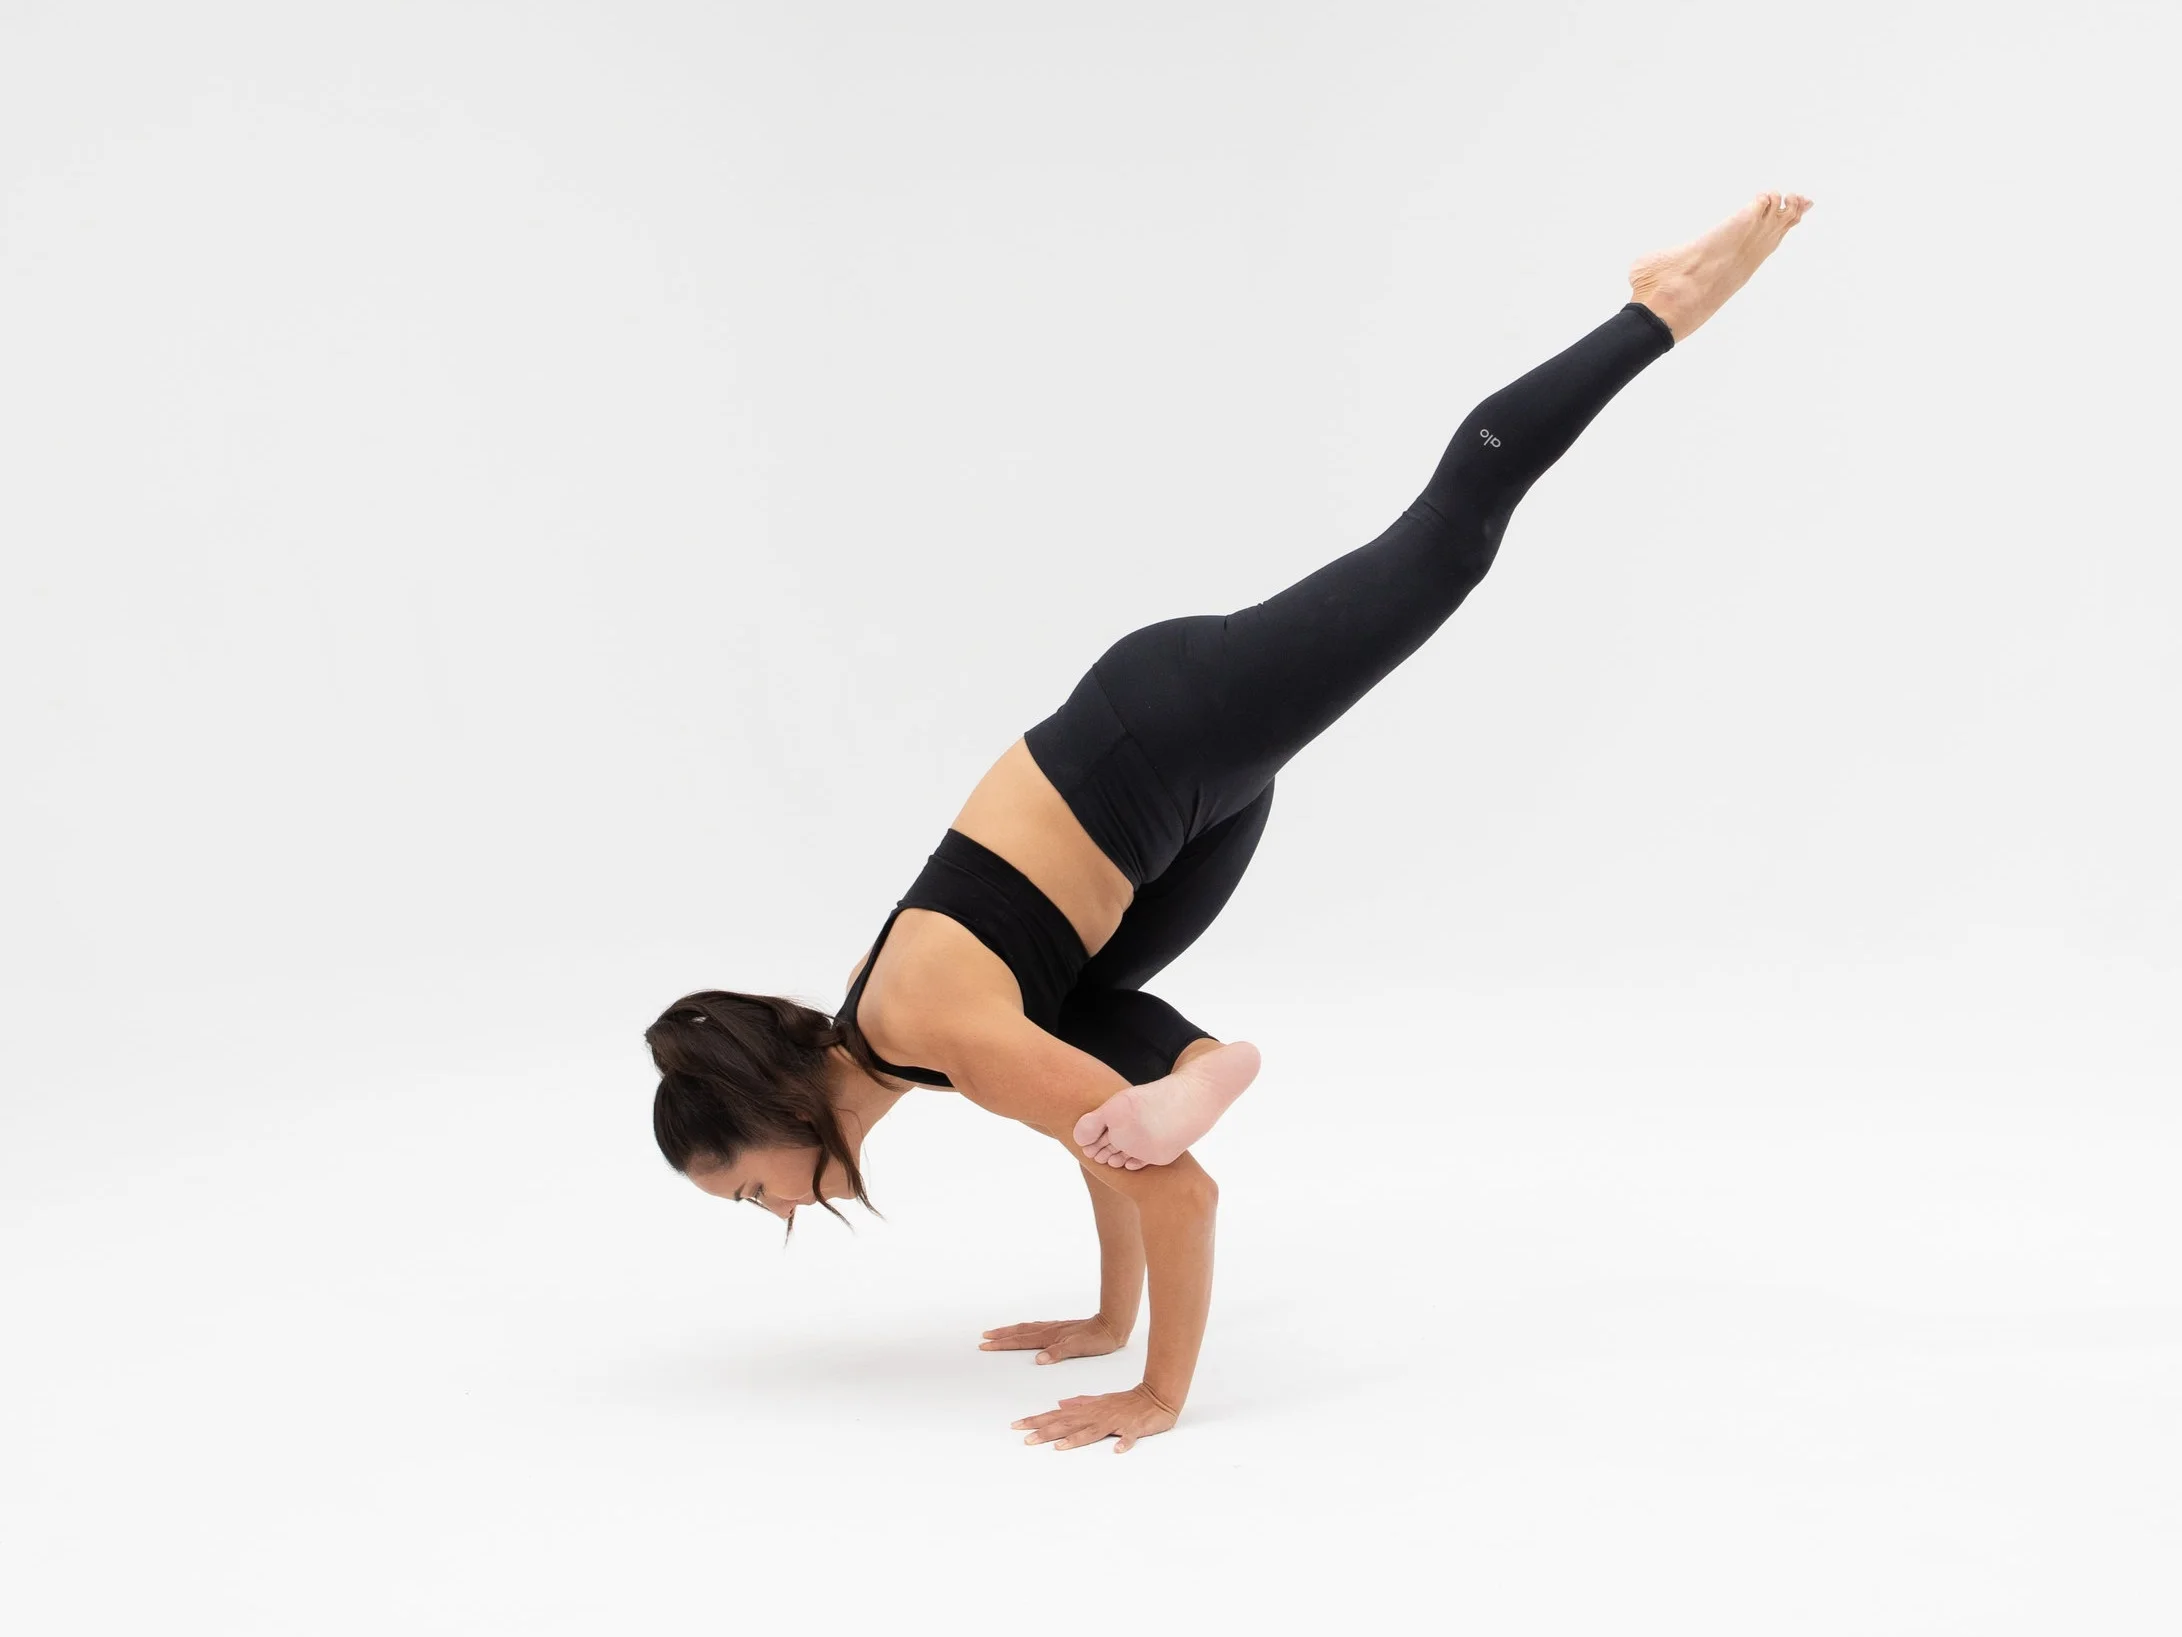
Lean forward into your fingertips more and extend that leg back and up.
Liked this Flying Pigeon tutorial? Kickstart your home yoga practice with a free two-week trial to AloMoves.com. We recommend these full-length yoga classes: Adrienne Kimberley's Fire and Fly and Patrick Beach's Flying Pigeon.


