Here’s Everything Beginners Should Know About Foam Rolling
Whether you have a foam roller at home but haven’t touched it yet or you’ve seen someone use it at the gym and wanted to know what it was all about, you’ve come to the right place. The cylinder-shaped tool (made of, you guessed it, dense foam) may look simple, but there’s actually a lot to it. Alo Moves fitness instructor and certified personal trainer Roxie Jones loves foam rolling as a warmup and cooldown, and below, she explains the benefits of using a foam roller, where to start, some key things to avoid, and the different types to choose from.
Foam Rolling for Beginners: Q&A
What is foam rolling?
Foam rolling is using a lightweight foam cylinder to essentially give yourself a deep tissue massage. You can control the amount of pressure you’re using with the foam roller, and it can help release any knots, tension, soreness, and tightness in your muscles to keep them loose.
What are the benefits of foam rolling?
Jones says that the main benefit of foam rolling is that it promotes blood flow to muscle groups, which improves your recovery after a hard workout. Another pro is that it keeps your tissues soft and flexible, decreasing the risk of injury. The extra circulation can also help reduce inflammation, relieve any soreness, and improve your range of motion. Also, by breaking up any tightness in your muscles, foam rolling can generally be a relaxing part of your fitness routine — especially since you’re lying down.
“Think of your muscles as a sponge. If you don’t get blood flow in there, it’s going to get crusty, dry, and won’t move as well. We want our muscles to be as soft as possible for training so we can move better.”
Where do I start foam rolling?
It depends on the training session and which muscle groups you’ll be using, says Jones. To start though, concentrate first on the muscles that feel the tightest or need the most relief before or after a workout. If you don’t feel like you need to focus on one specific area, hitting all major muscle groups is a good go-to. Work your way through rolling your chest, lats, shoulders, thoracic spine, glutes, hamstrings, quads, and calves.
Should you foam roll before or
after a workout?
When it comes to foam rolling before or after a workout, Jones says there’s no correct time to foam roll: Do it pre- or post-workout, or both! Whatever you feel your body needs. If you prefer to warm up before a workout, Jones suggests rolling for 10 to 15 minutes to get your blood flowing. After you get in a sweat, she says you can roll for however long you feel you need to properly decompress and work through any muscle tension.
What should you never do when
foam rolling?
Jones explains that rolling too quickly over your muscles can be ineffective. Also, holding the pressure for too long before a session can promote too much relaxation. Basically, you don’t want to go too fast or be completely stationary with it. If you do prefer the latter though, it’s best to hold the pressure or spend longer periods rolling after a workout.
What are the best foam rollers
for beginners?
Start out with non-textured rollers and progress to textured ones as you use them more and get used to the sensation. Textured foam rollers include knobs and ridges on them that press deeper into your muscles. You can also start with lighter pressure and then increase it. Jones also recommends following up the foam rolling with stretching for whichever muscle group you rolled out to further promote more blood flow and tissue elasticity.
4 Easy Foam Rolling Exercises for Beginners
In this Foam Roll Recovery class, Jones walks through some moves and stretches. Below are four easy ones to do pre- or post-workout.

1. Shoulder Roll
Lie down on your stomach with one arm out to the side and the other forearm parallel to the front of the mat.
Place the foam roller vertically under your outstretched armpit.
Slowly roll side to side to release the tension.
Want more upper-body shoulder stretches? Check out Foam Rolling for Arms: 5 Feel-Good Moves

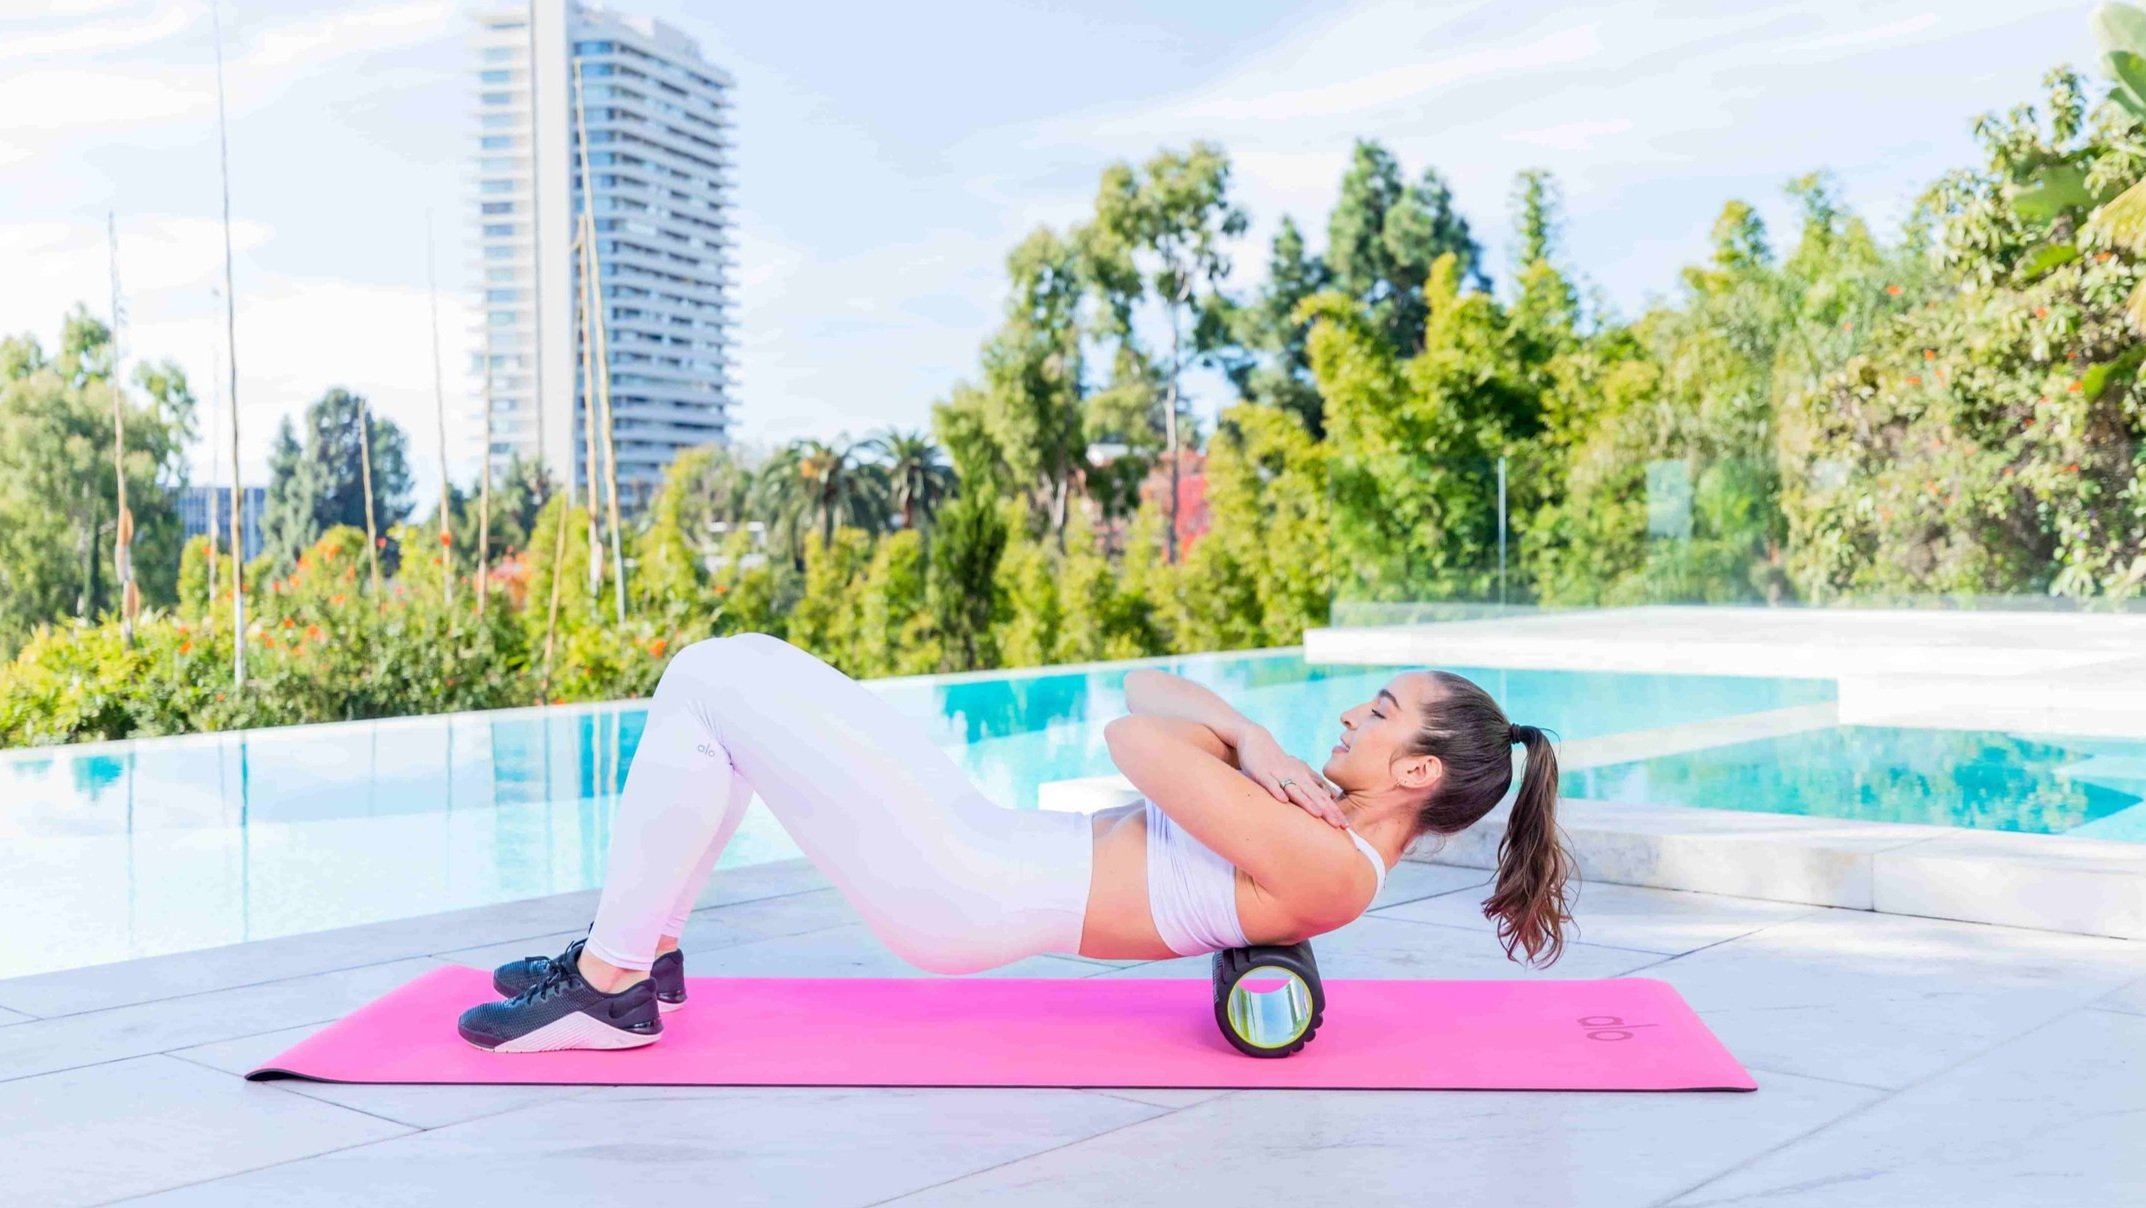
2. back roll
Lie back on your foam roller with your knees bent and feet flat on the ground. Position the foam roller horizontally under your shoulder blades.
Cross your hands over your chest or place your hands behind your head.
Lift your hips slightly off the mat and slowly roll up and down your shoulder blades, relaxing your weight into the roller.

3. Quad Roll
Come to a Forearm Plank position with one hand on the mat and position your foam roller under your quad.
Using your arms, roll your quad up and down. You can come onto your hands if needed.
If you encounter any tight spots, move your quad from side to side to work them out.
Switch to the other leg.
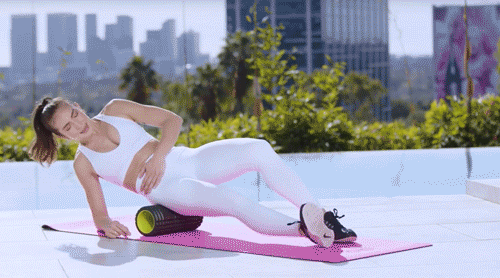
4. Glute Roll
Sit one side of your glutes on the foam roller.
With both legs out straight and your arm supporting your balance, roll up and down from the top of the hip to the middle of the glute.
Switch sides.
Want even more recovery tips from Roxie Jones? Check out her post-workout mobility classes, stretches, and strength training on Alo Moves with a free 14-day trial.